We and our partners use technologies, such as cookies, to recognize you and show you more of what you like. Please read our Privacy Policy to learn more. By using this website you agree to the use of those technologies.
I agree.
Inject some fun in your party invitations by adding a Lomograph liner inside! Whether it’s for your kid’s birthday party, some casual event, or even a wedding, adding this small modification is sure to set your RSVP’s ablaze! Here’s what you need to get started:
Materials:
Pencil
Double Sided Tape
Scissors
Ruler
Envelopes (size A7)
Card stock
Photo cropped and resized to be 6.5 inches wide x 6 inches tall and printed on white card stock.
Trace the outline of the envelope on the card stock. After finishing the template, cut a little bit off the edges to make sure it fits inside the envelope.
Cut the photos that you’ve traced. Place them inside the envelopes, making sure it’s in the right place and not askew. Put double sided tape at the back of the photo to secure it.
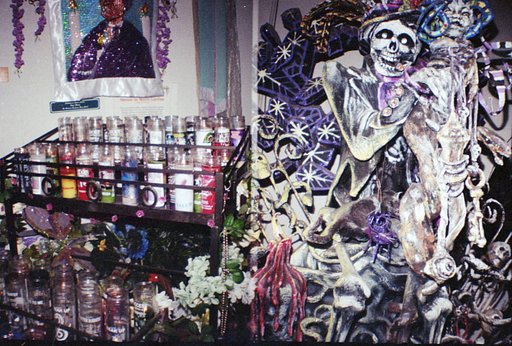
LomoAmigo Angela Izzo is known in our community for her striking, psychedelic style. On a recent trip to New Orleans for Halloween and the Day of the Dead, she knew she had to embrace her experimental practice in the name of the season — all with an array of Lomography cameras and film!
The sun's out and so should our film cameras be! In this article we've listed a few fun, classic and experimental photo styles to give you inspiration for your summer shenanigans with the help of our creative community members.
Going to a Party and feeling experimental? In today's tipster we are looking into how to shoot double exposures with flash, and without overexposing the photos on your Instax film!
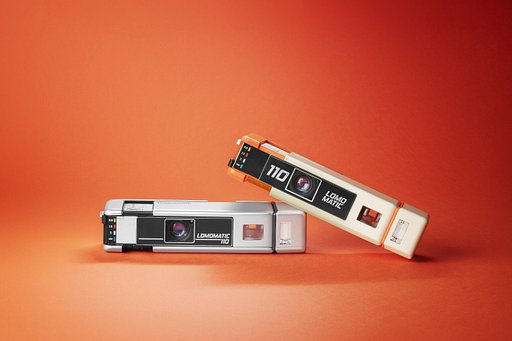
The Lomomatic 110 is your compact companion for every adventure! Featuring a glass lens, automatic exposure, day and night aperture modes, controllable ISO settings and a flash, get ready to capture your memories in vibrant, super-sharp 110 frames, with a depth of field you’ve never seen on a 110 image ever before!
Last spring, in collaboration with Perimetro, we launched an Open Call in which we invited photographers from all over Italy to create a personal project with one roll of 35 mm Lomography film. Today we present Francesca Tilio’s "Teenagers of the 21st Century", shot on LomoChrome Metropolis.
As part of our mission to save 120 film we invited our partners at Chengdu Photo Store to join the adventure and try out the Diana F+. Check out these photos taken by store owner Hu Yingjun and hear his hopes for the future of medium format film photography.
Boston-based Levi Cyr-Redcross brings refreshing energy to the art of film photography. Not confined by a particular style, Levi aims to explore the medium in all its forms and test his creativity. This is his quick review of the Lomo LC-A 120.
Jump outside of your comfort zone and take sensationally striking shots with the signature bokeh of the New Petzval 55 mm f/1.7 MKII! Available in Brass, Black Brass and Black Aluminium finish!
Last spring, in collaboration with Perimetro, we launched an Open Call in which we invited photographers from all over Italy to create a personal project with one roll of 35 mm Lomography film. Today we present Elisa Norcini’s "Città da Favola", shot on LomoChrome Turquoise.
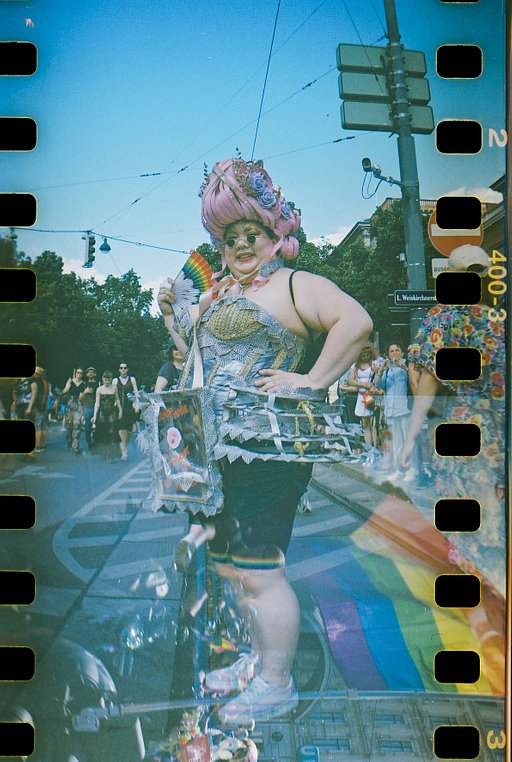
The Pride Parade is an important event that is celebrated in many cities across the world. We decided to document the march in Vienna with a Sprocket Rocket Camera to capture all the action in one awesome panoramic frame!
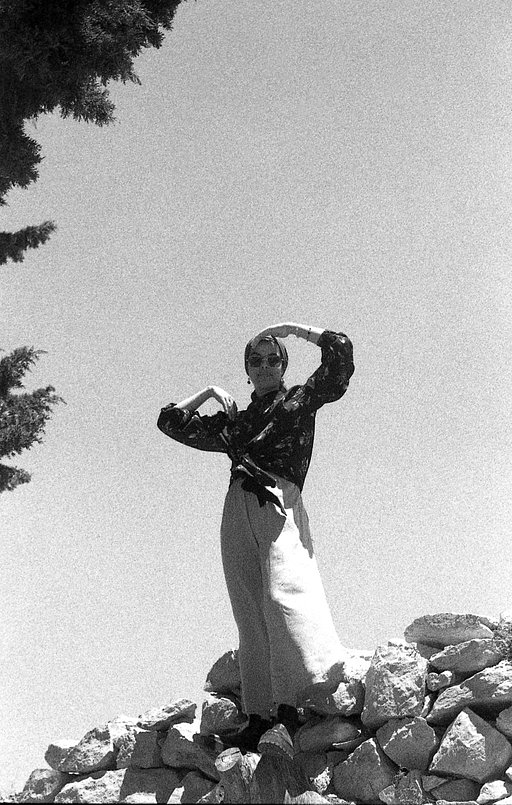
Last spring, in collaboration with Perimetro, we launched an Open Call in which we invited photographers from all over Italy to create a personal project with one roll of 35 mm Lomography film. Today we present Nastassia Isawi’s "Le Donne Palestinesi", shot on Berlin Kino 400 ISO.
Ignite the legacy of a fascinating but forgotten scientist, Ibn al-Haytham, and become a master of light with this unique lens designed for spherical aberration control on full-frame mirrorless cameras. Shipping Live Now!
Last spring, in collaboration with Perimetro, we launched an Open Call in which we invited photographers from all over Italy to create a personal project with one roll of 35 mm Lomography film. Today we present Umberto Verdoliva’s "Lo Scugnizzo Liberato", shot on Lady Grey 400 ISO.
Last spring, in collaboration with Perimetro, we launched an Open Call in which we invited photographers from all over Italy to create a personal project with one roll of 35 mm Lomography film. Today we present Giorgia dal Molin’s "Ostranenie di Paola", shot on LomoChrome Metropolis film.
Last spring, in collaboration with Perimetro, we launched an Open Call in which we invited photographers from all over Italy to create a personal project with one roll of 35 mm Lomography film. Today we present Giuseppe Scianna’s "Italian Summer", shot on Color Negative 400 ISO.


No Comments